Shell Scripting For DevOps Engineers
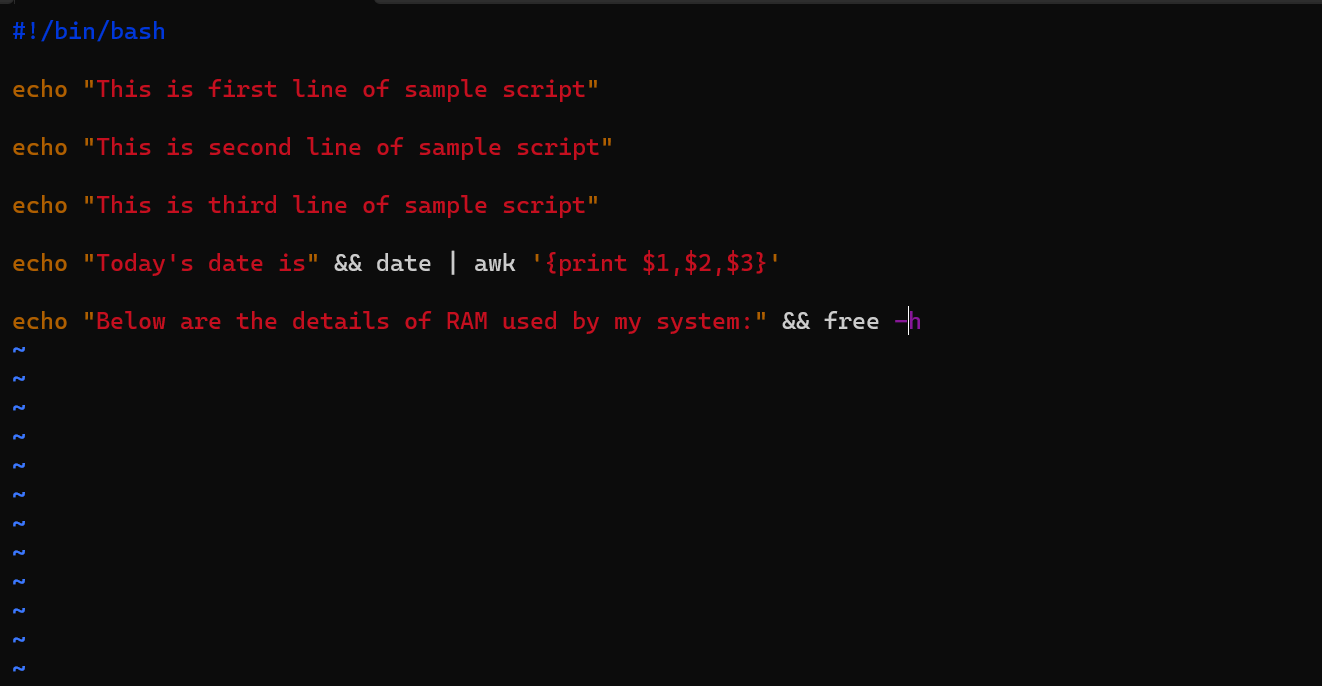
#!/bin/bash :
On Linux, a shebang (#!) is a special line at the beginning of a script that tells the operating system which interpreter to use when executing the script, followed by the path to the interpreter.
NOTE: Every script has .sh format
vim sample_script.sh: to create a script file
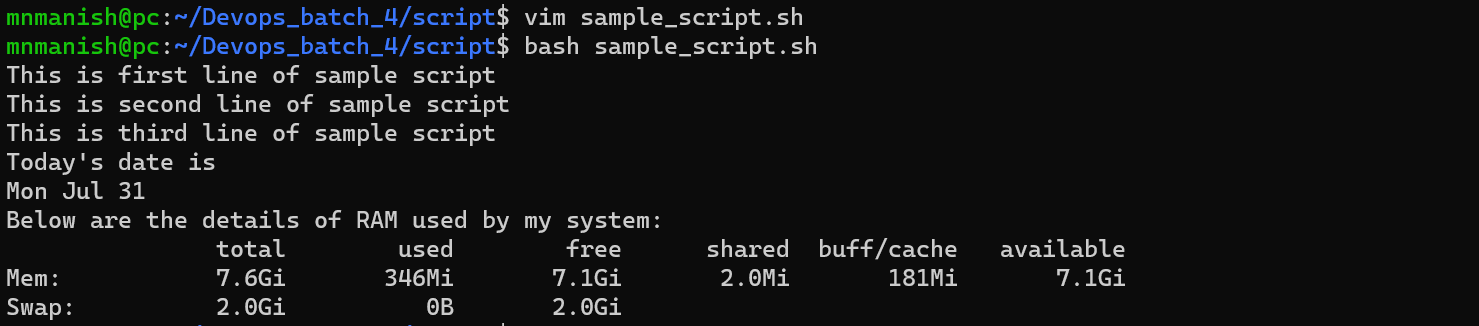
bash sample_script.sh: to run the script
date : to get the current date
awk ' {print $1,$2,$3} : to getonly column 1,2,3
free -h: to know the RAM usage (-h: human readable format)
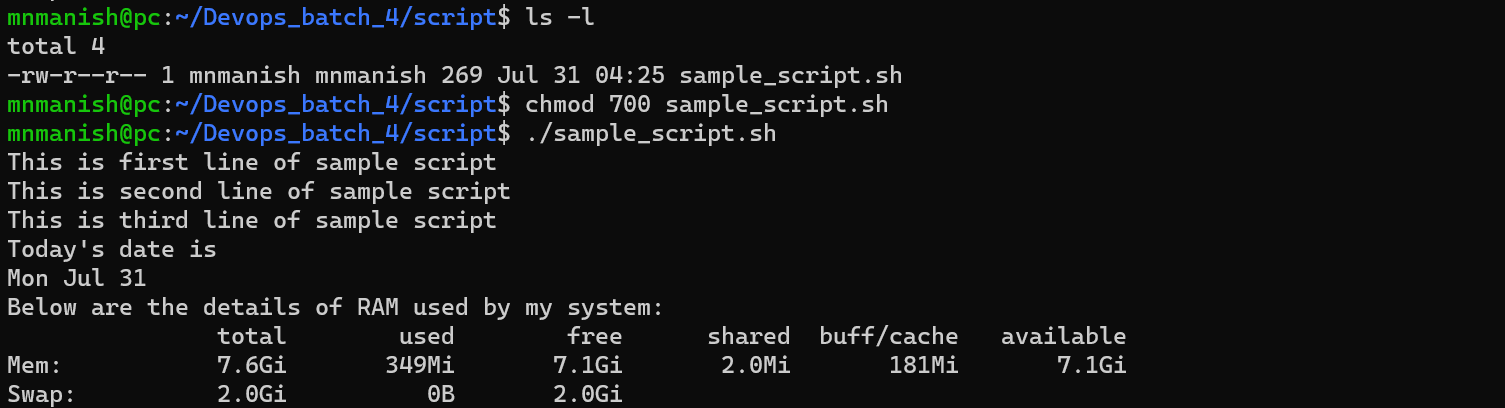
ls -l: to view the permission of the file sample_script.sh
chmod 700 sample_script.sh : to change the permission to executable for user
./sample_script.sh : it can be used to execute the script after providing the permission to be executable for .sh file
variables script
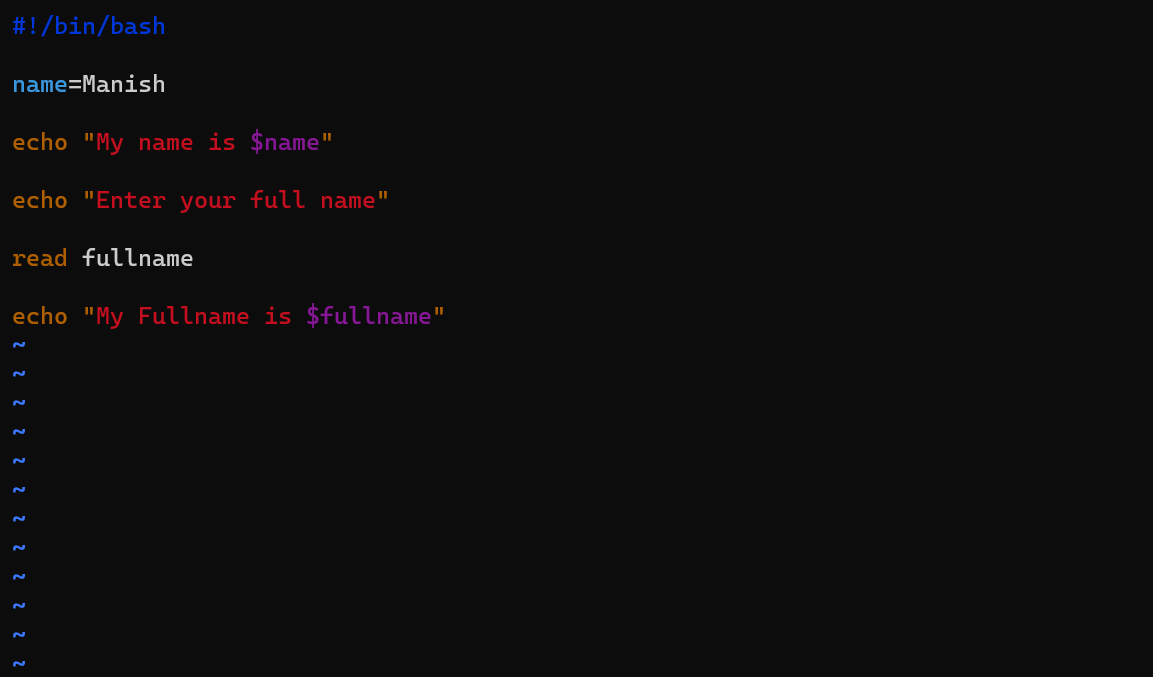
vim variables.sh: to create a script file
NOTE:
name=Manish (name is variable which store the value of Manish)
$name(will take the value from name=Manish)
read fullname: (will take the name from the user)
$fullname(will take the value of fullname from read fullname
chmod 700 vaiables.sh : to changes the file permission to be executable
./variables.sh : to execute the variables.sh file
NOTE: after enter your full name the interpreter wait for user to input the fullname and then execute the next commands

Arguments script
vim arguments.sh : to create arguments.sh script
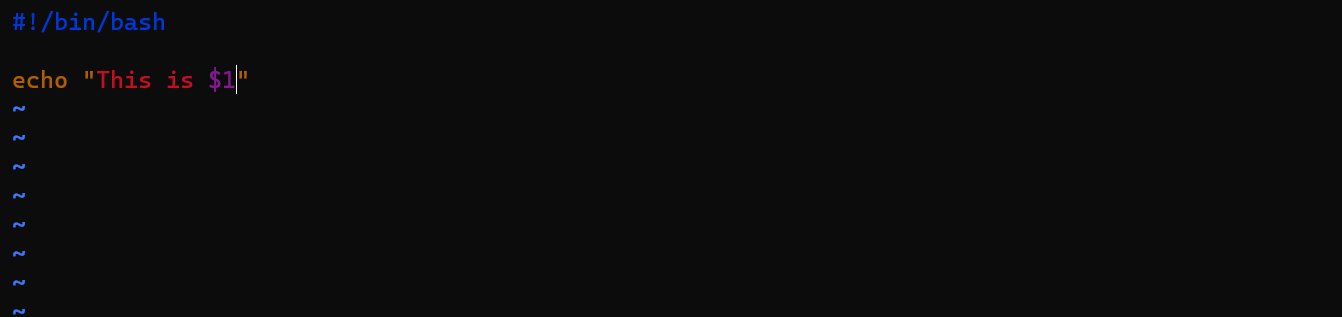

NOTE:
O/P: This is (As no arguments have been passed after ./arguments.sh)

O/P: This is Arguments_script (as Arguments_script has been passed after ./argument.sh)
echo " This is $1" ($1 represents the first argument)
How to install package using arguments?
vim install_pkg_by_args.sh : to create script file
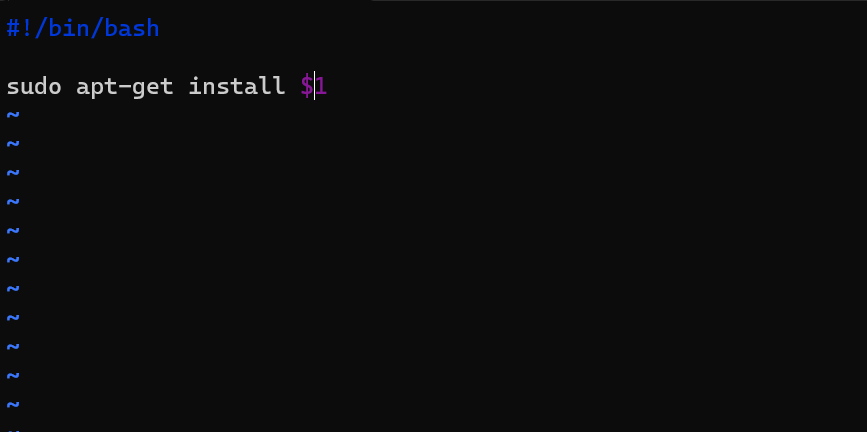
sudo apt-get install : to install the package by using internet
$1 : the first argument

./install_pkg_by_args docker.io : will install the docker.io(as it is the first argument to be installed by sudo apt-get install)
Interview question
NOTE: $1 $2 $3 will take 3 arguments
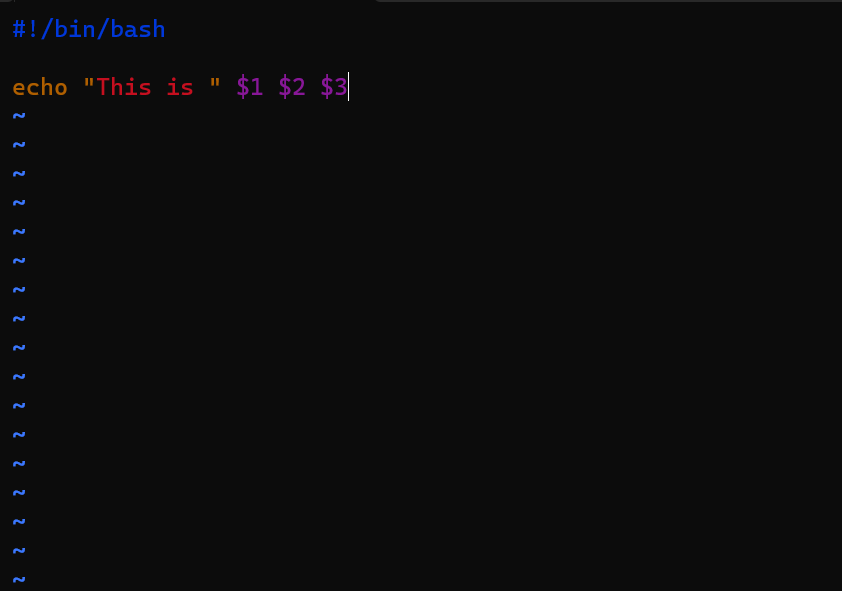

But what if we give 4 arguments ( it won't print the 4th argument [example])

$# : To know the total arguments
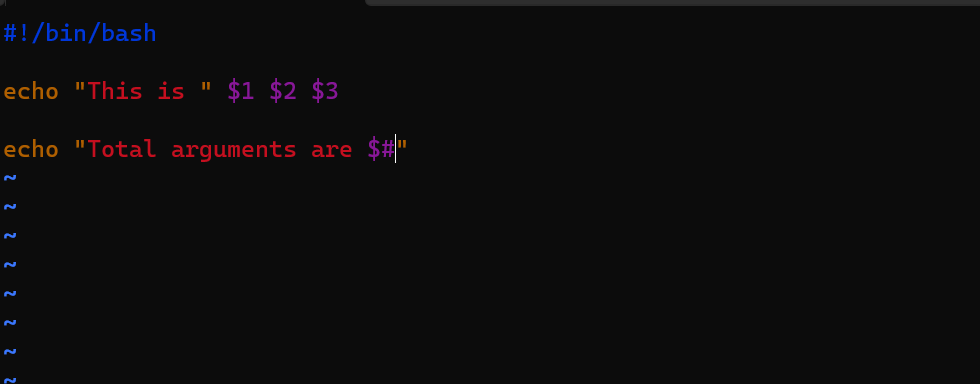
Total arguments 3: argument file script

$@ : To print all the arguments passed
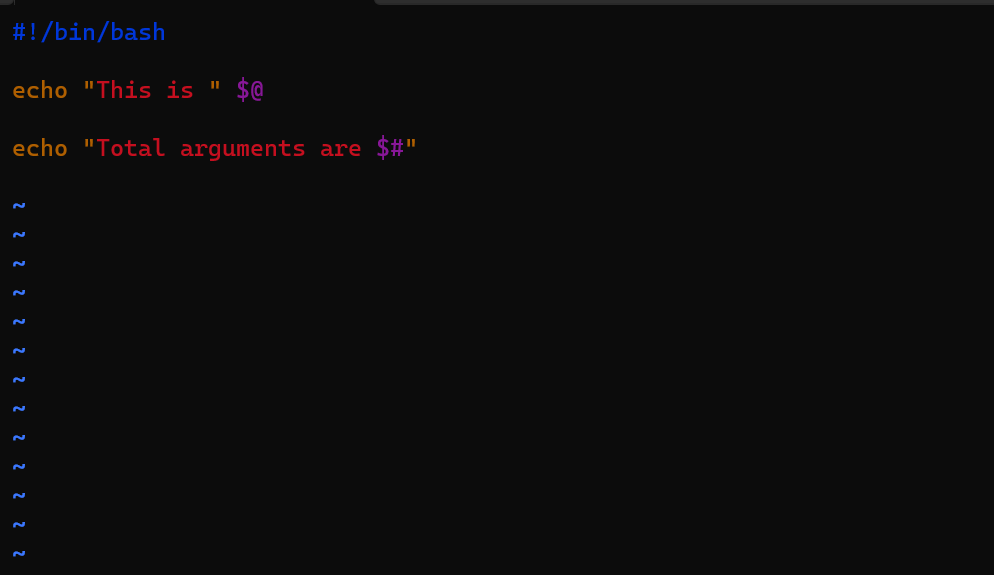

NOTE: All the arguments are passed by using $@ and total number of arguments are calculated by $
for -loop script
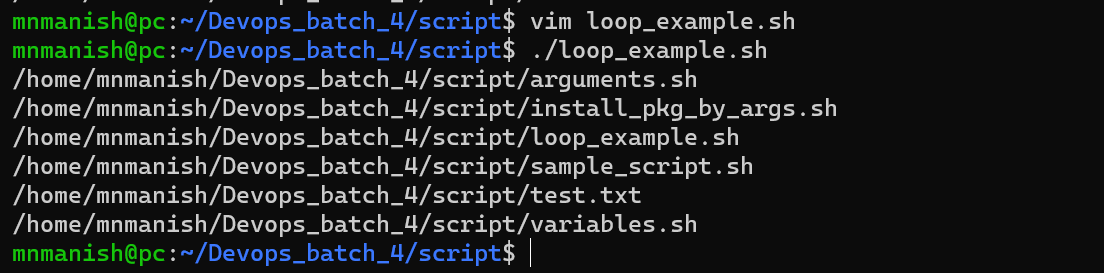
vim loops_example.sh : to create loops_example script file
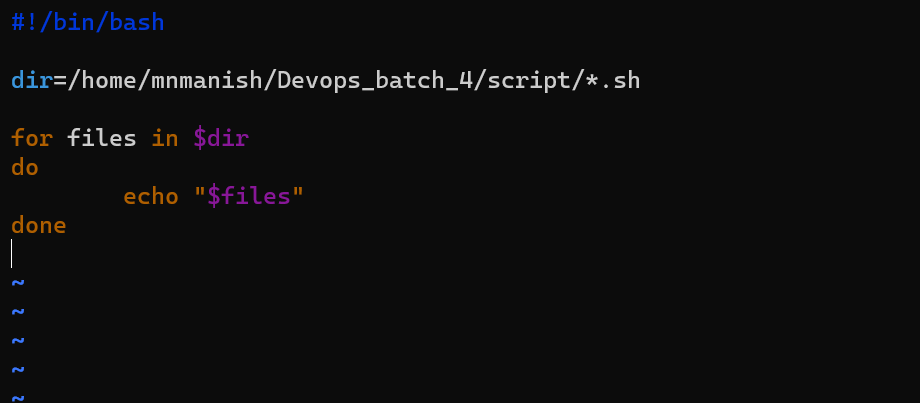
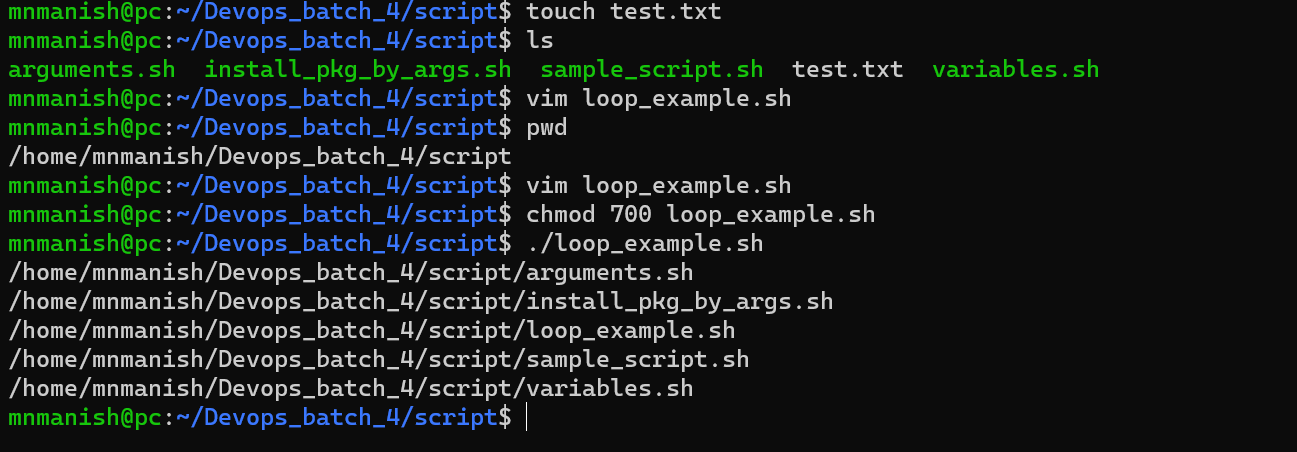
NOTE:
pwd : print working directory to get the path
*.sh : refers to all the files with .sh extension
for files in $dir (will run the loop for all the files in dir[specified path])
do echo " $files" (print all the files with .sh extension)
done (to end the for loop)
. : will print all the files in the location
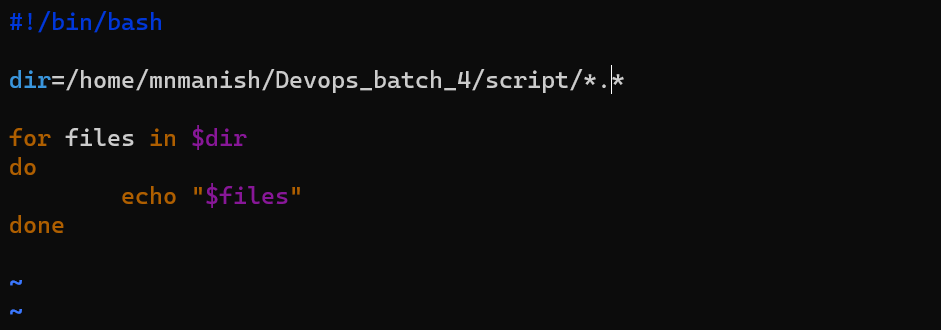
Printed all the files including test.txt file
if-else conditions script
vim if_conditions.sh : to create if_conditions.sh file
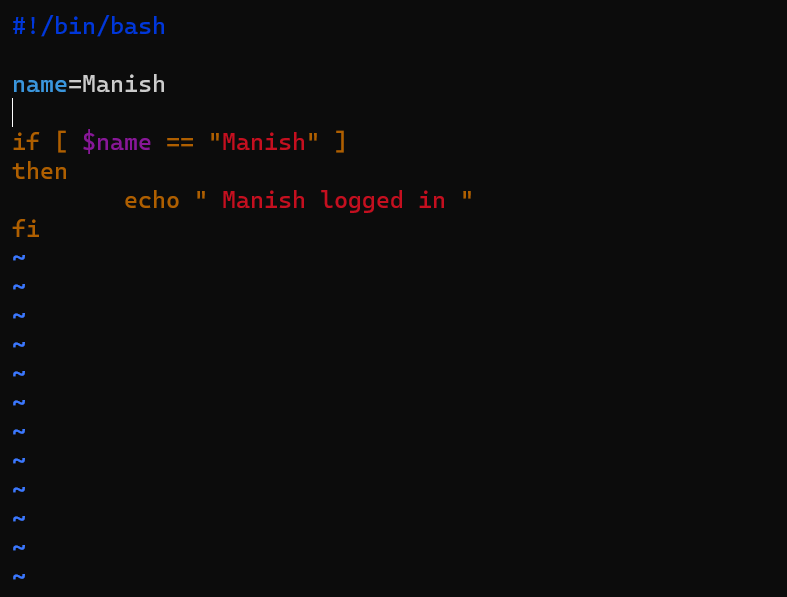
NOTE: name=Manish (variable Manish value is assigned to name)
if [ $name == "Manish" ] (if condition checks if the name is equal to Manish)
then echo " Manish logged in" (print the statement if conditon is true)
fi (if condition ends)

else (condition execute when if condition is false)
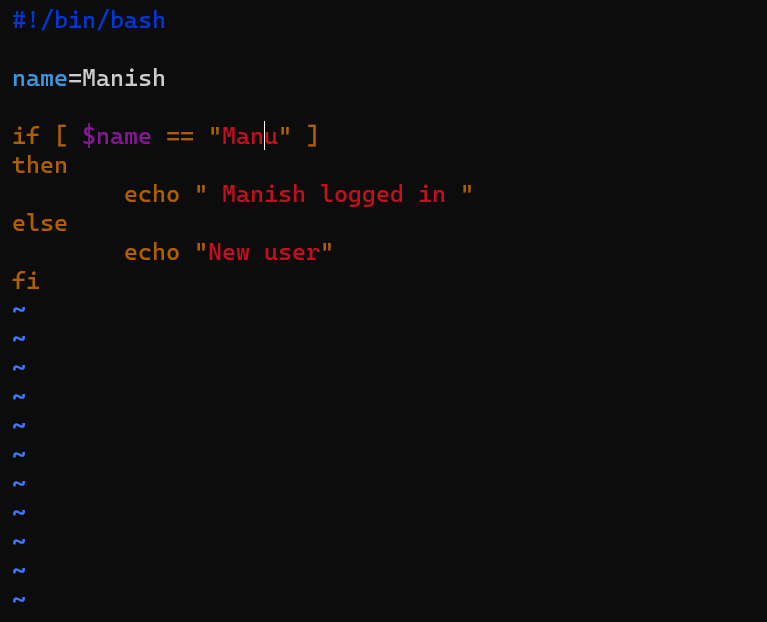

O/p : New user (as the if condition is false and else condition is true)
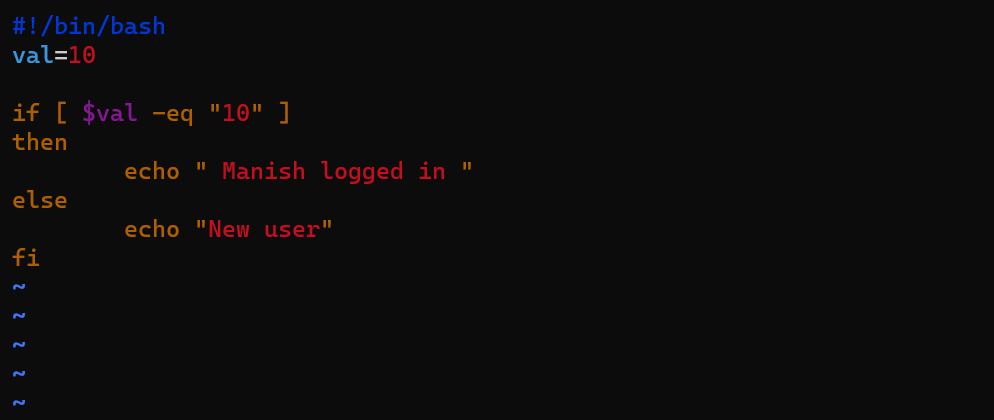
-eq can be used in place of ==

Add user script
vim add_users.sh : to create add_users script
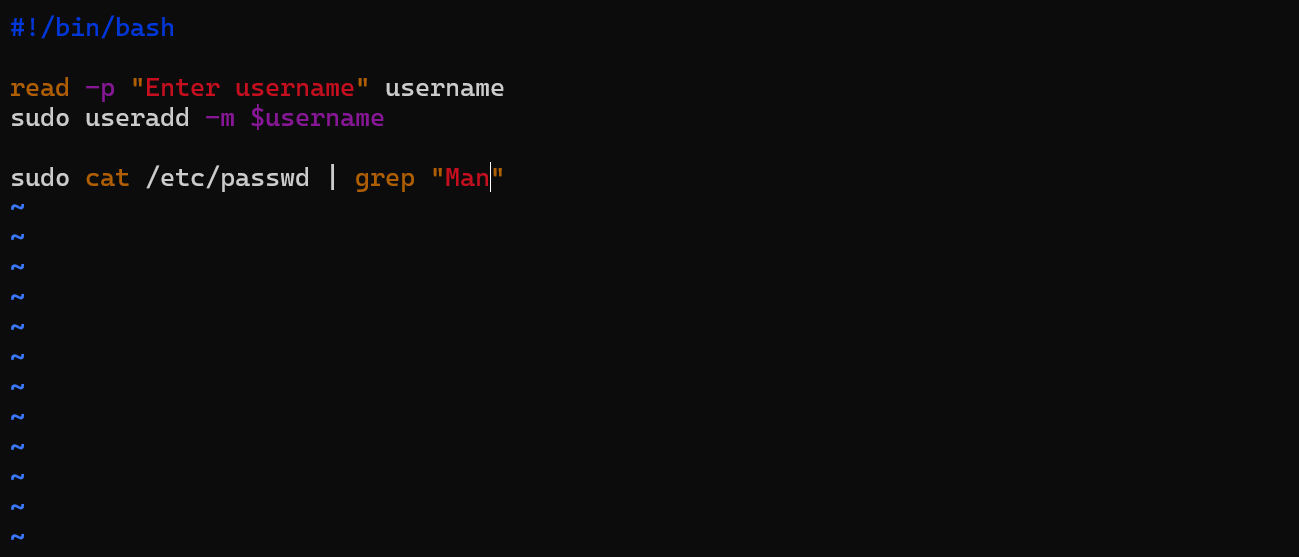
read -p "Enter usename" username (will prompt the screen with Enter username and read variable username)
sudo useradd -m $username (will create a user and take the value entered by user)
sudo cat /etc/passwd/ (will show all the users)
grep "Man"( will show the users having Man in their name)

O/P : shows all the user added and having Man in them
Add multiple users using for loop
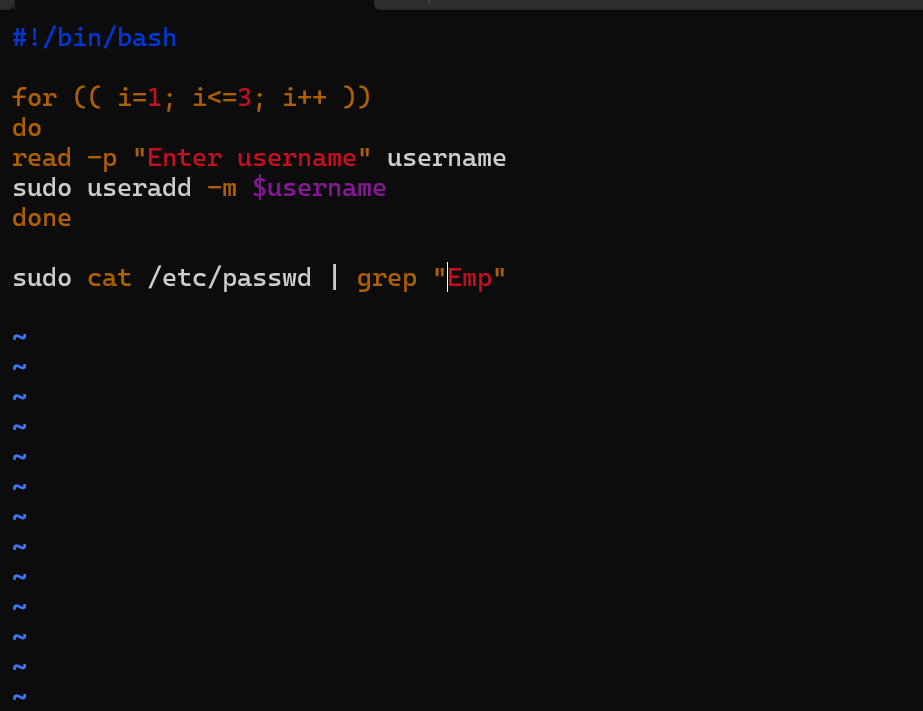
for (( i-1; i<=3; i++ )) (will iterate the loop until the condition becomes false 3 times)
do read -p "Enter username" username (will read the username 3 times)
sudo useradd -m $username (will add the user 3 times)
done (will end the loop)
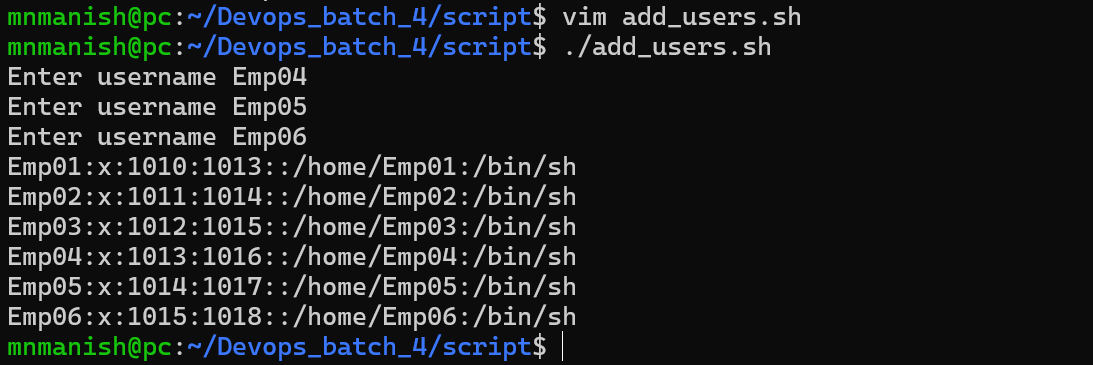
sudo cat /etc/passwd | grep "Emp" (this will print the users having "Emp"
How to create a backup file?
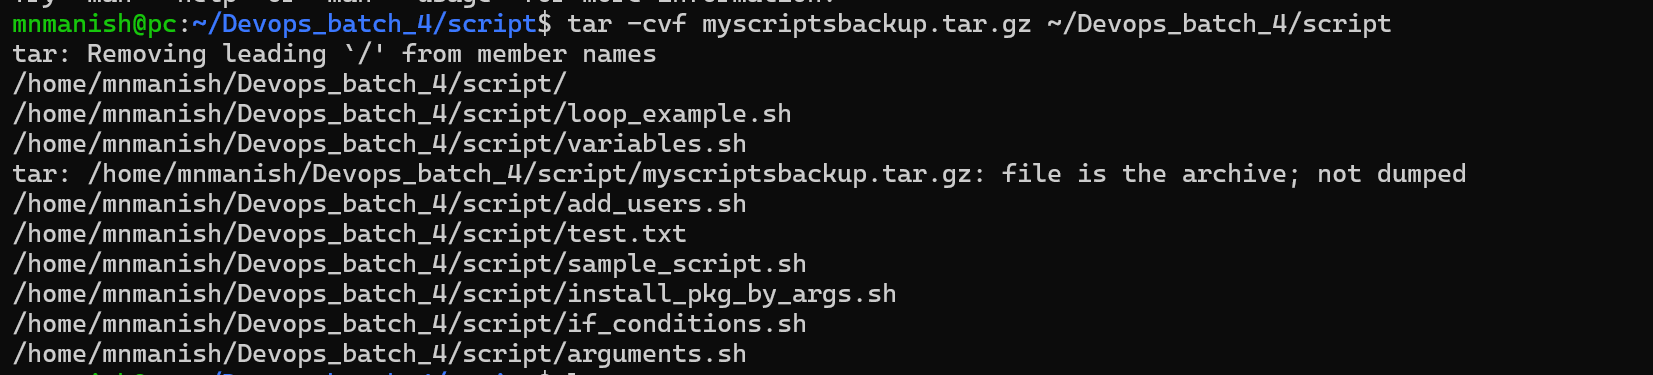
tar -cvf filename.tar.gz pathoffile (will create a backup of the file in the location specified)
-c : to create and compress the backup file.
- v: shows the information of file.
- f : to give the name to the file.

ls : shows the file myscriptbackup.tar.gz has been created
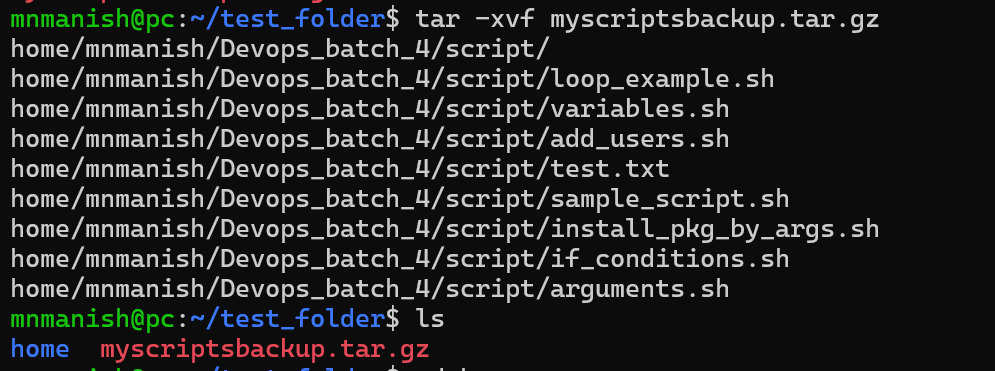
How to extract a backup file?
tar -xvf myscriptbackup.tar.gz (will extract the backup file [home->mnmanish->script-all the scripts])
How to take auto-backup using crontab?
create script as take_backup.sh
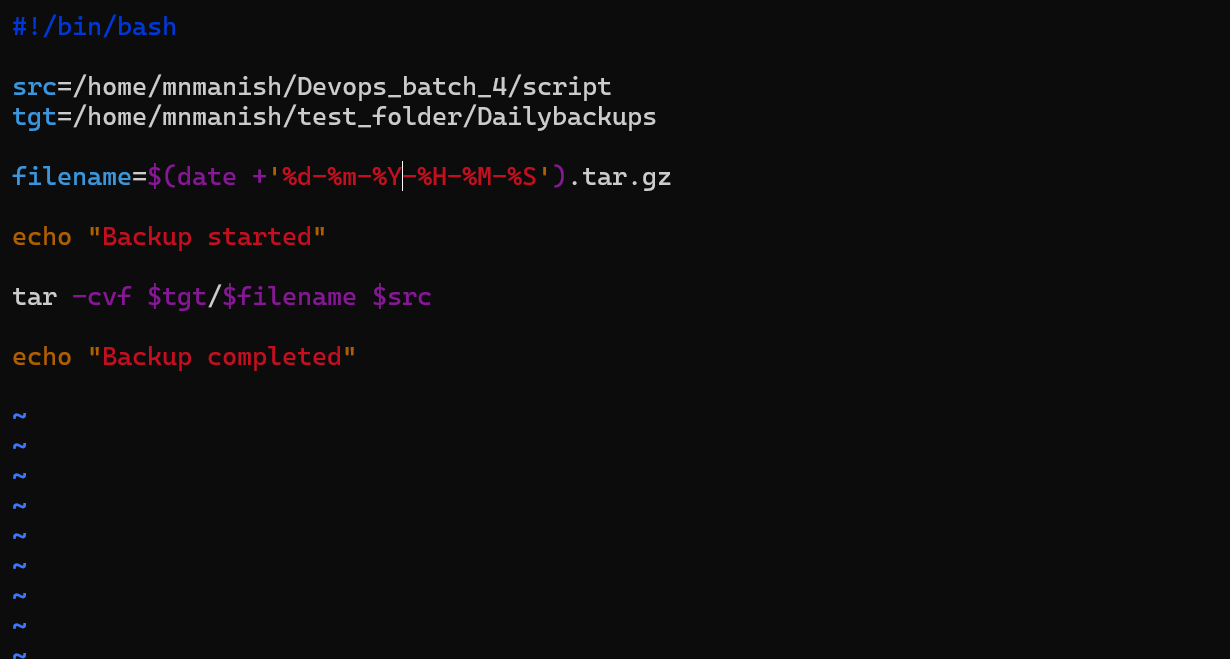
src=/home/mnmanish/Devops_batch_4/script (where take_backup.sh scri[pt is located)
tgt=/home/mnmanish/test_folder/Dailybackups (where backup is to be created)
filename=$(date +'%d-%m-%Y-%H-%M-%S').tar.gz (file created with current date and time and stored in variable filename)
tar -cvf $tgt/$filename $src (backup file is created with dd-mm-yy-m-h-s format in src)
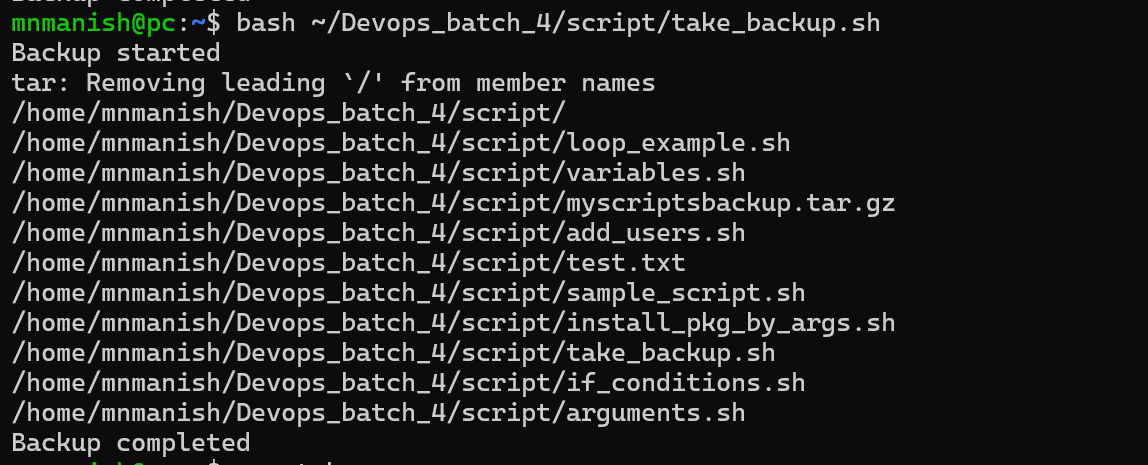
bash /home/mnmanish/Devops_batch_4/script/take_backup.sh (test if script is running)
create crontab
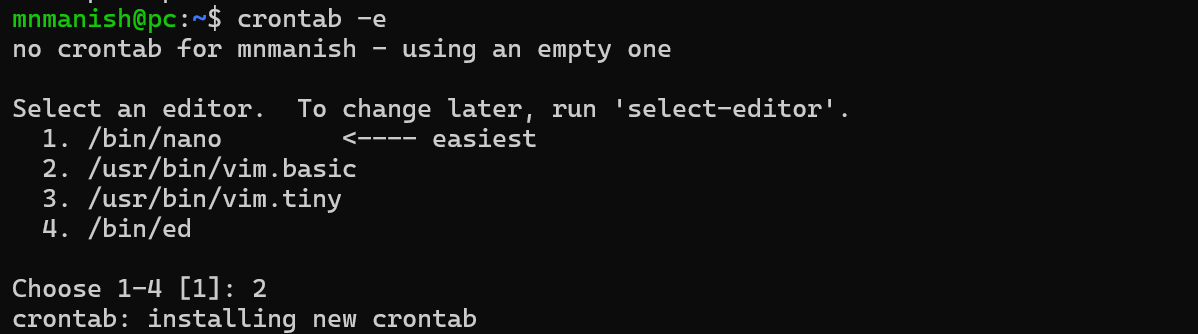
crontab -e (to see the current crontabs)
select 2 as vim editor
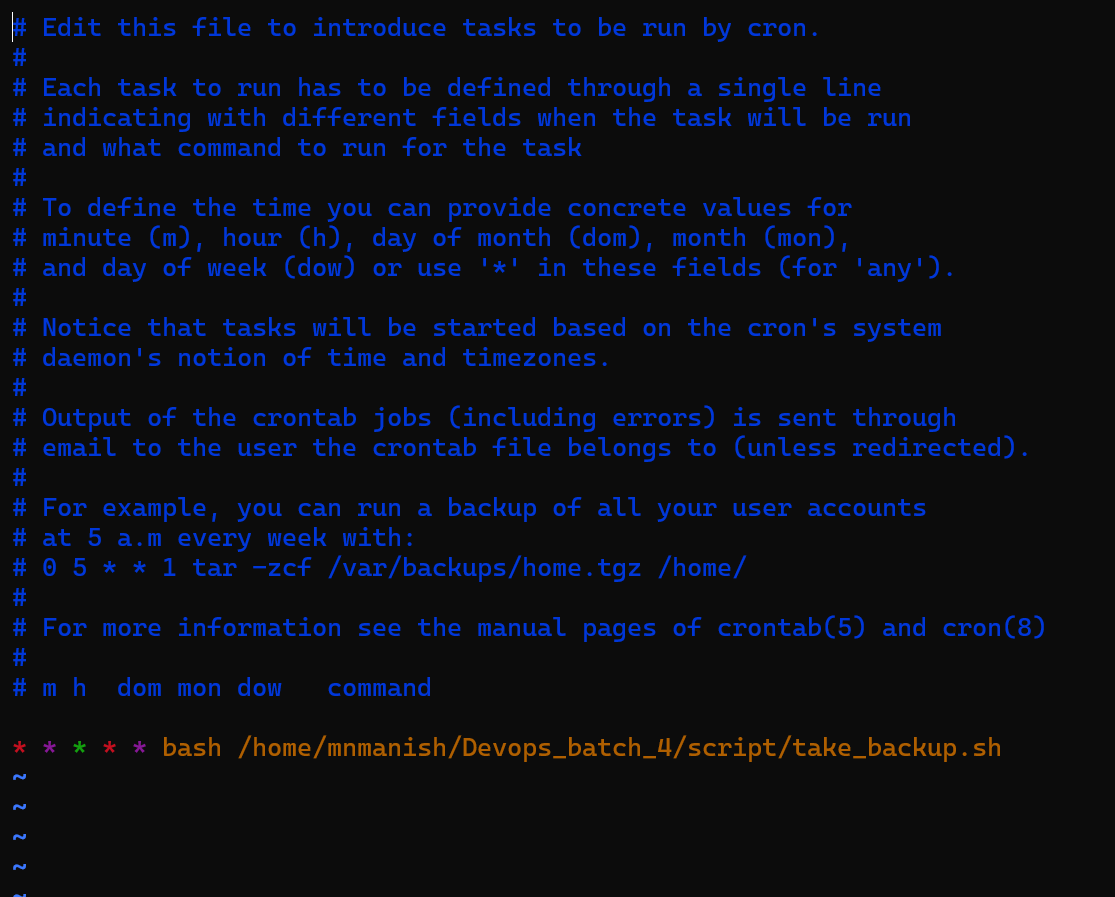
NOTE : Above command will execute the take_backup.sh Every minute every hour every day of mon every month every day of the week
Now the backup will be generated every minute in Dailybackups

watch -n 2 ls (to auto watch any change in file like new backup created [refresh screen automatically])



